Add and maintain short description text to a project in Word, InDesign, and ScML.
References/Prerequisites
Prerequisites
- SAI Documentation (Scribe Add-In for Word)
- Digital Hub Documentation
- Short Description Text (Alt Text) QC
Additional Resources
- University of Michigan Guidelines
- WebAIM
- Describing Visual Resources Toolkit
- Harvard University: Write helpful Alt Text to describe images
- W3: An alt Decision Tree
- Kindle Previewer
- Thorium
Alt Text Content
Alt text is used to visually describe a figure for a low-vision reader. The alt text will be read aloud to a reader who is using accessibility settings on a device.
Writing Alt Text
Alt text is meant to be heard and not seen (even though it can be seen in a Web PDF when hovering the cursor over it), so it should be written in a way that does not depend on any visual aspect, only the ability for technology to read it as intended. As such, all visual aspects like quotation marks and character styles are irrelevant on a practical level. If it is important editorially, then it should be presented in the body of the book.
Alt text is not a full description. It should give the reader a “glance” at the image through words. Do not add detail the reader would not be able to access.
- Describe what is happening in the image (i.e., whether it is a chart or photograph, whether an action is taking place).
- If there is a figure title or caption, avoid repeating the same information in the alt text.
- Answer “who, what, where, when, why, and how” questions about the image in as few words as possible.
- Convey purpose of image within context.
- Hyphens with spaces on either side are not correct. Use punctuation that would work in a typical sentence such as commas, periods, colons, em dashes, and so on.
- Avoid abbreviations (e.g., “Ch” should be “chapter”).
Examples
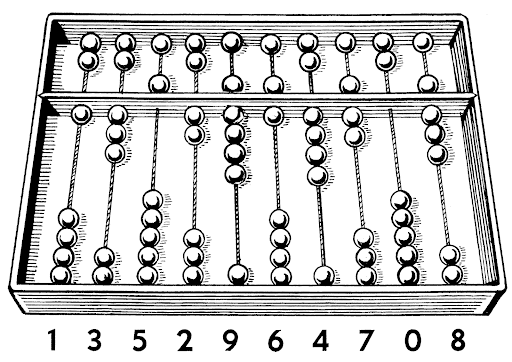
Alt text: A drawing of an abacus with an unequal number of counters along several rods.

Alt text: A screenshot of the LibriVox home page for free public domain audiobooks. A pop-up for the Mozilla Firefox browser is in the bottom right corner.
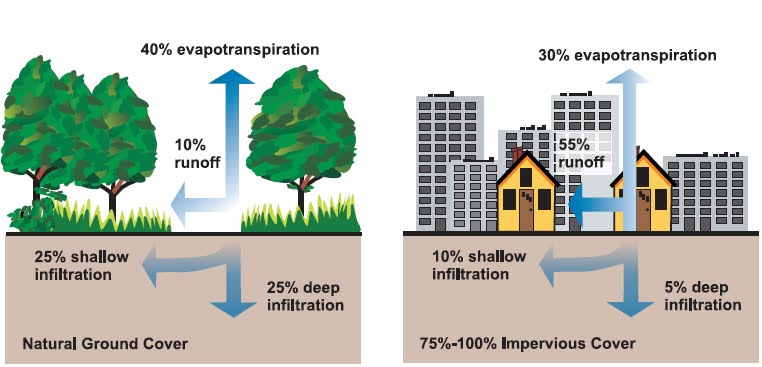
Alt text: A diagram comparing natural and impervious cover for water runoff, evapotranspiration, and shallow and deep ground infiltration.
Character Limit
The SAI’s Insert Image tool imposes a limit of 150 characters. When this tool was created, many e-readers cut off text at as few as 125 characters. Technically, there is no limit to the length of alt text, but Scribe recommends keeping these descriptions short. If the alt text needs to be longer and more descriptive, it should be in the body of the book.
Quotation Marks and Control Characters
Alt text can contain curly quotation marks and apostrophes. The markup in XML files contains the text within straight double quotes inside of tags, so those characters would interfere with how the text is handled.
Alt text cannot contain HTML/XML control characters (<, >, &, ", ').
Emphasis and Character Styles
The behavior of readers with respect to emphasis is not extended to alternative text. Character styles are not supported in alt text.
Add Alt Text Early
When possible, add alt text in Word as early as possible in the publishing process; however, alt text can be added at any time. The WFDW includes methods to maintain alt text throughout the different stages of editing and production.
Short Description Text Callouts in Word
The callouts for images need to match the file name for the image, and they should follow the exact text pattern provided by the SAI’s insert Query Tool, with an added ALT: trigger. The text will have the fig paragraph style and img character style applied to it.
This example is for a file named fig01.jpg, using the alt text “The Princess of Spain surrounded by attendants”
In Word:
{~?~IM: insert fig01 here. ALT: The Princess of Spain surrounded by attendants}
This text pattern will enable the Place Single Image tool in InDesign to access the short description text when placing images.
In IDTT:
<ParaStyle:fig><CharStyle:img>{~?~IM: insert fig01 here. ALT: The Princess of Spain surrounded by attendants}<CharStyle:>
In InDesign
Importing Short Description Text from IDTT
Import IDTT into InDesign.
Option 1: Use the Place Single Image tool by highlighting the figure callout plus the figh/figcap text (whatever caption text is to be included in the caption box).
Option 2: Use the Place All Images tool.
For both options, the text that follows “ALT:” in the fig paragraph will be placed into the image’s Object Export Options window, accessible via the context (right-click) menu.
Adding Short Description Text Manually
Short description text can be added to images that have already been placed in InDesign.
Right-click into an image and select Object Export Options.
Paste the short description text into the window and click “Done.”
In sam Files
When exporting XML using Scribe Tools, the resulting sam file will contain the short description text in the callout for the image.
In sam:
<fig><img src="fig01.jpg" alt="The Princess of Spain surrounded by attendants"/></fig>
Note: This text will not appear in the “short description” field in the Hub. It will only appear there if the short description text is added by uploading it via a separate file or if pasted in manually. For any Hub conversion, the short description text appearing within the file itself will be prioritized over short description text added via the Hub interface.
In ScML and HTML Files
The following example shows an entire figure callout that includes short description text.
In ScML:
    <figure>
        <fig><img src="fig01.jpg" alt="The Princess of Spain surrounded by attendants"/></fig>
        <figh><page locator="p2"/><fighn>Fig. 1:</fighn> Diego Rodríguez de Silva y Velázquez, <tnw>Las Meninas</tnw>, c. 1656, oil on canvas. ©Photographic Archive Museo Nacional del Prado, Madrid.</figh>
    </figure>
This short description text will appear in an e-book’s HTML files created by the Hub’s conversion of ScML to ePub.
In HTML:
    <figure class="figure">
        <p class="fig"><img src="images/fig01.jpg" alt="The Princess of Spain surrounded by attendants" width="518" height="600"/></p>
        <p class="figh"><a data-locator="p2" class="page"></a><span class="fighn">Fig. 1:</span> Diego Rodríguez de Silva y Velázquez, <i class="tnw">Las Meninas</i>, c. 1656, oil on canvas. ©Photographic Archive Museo Nacional del Prado, Madrid.</p>
    </figure>
Decorative (Presentational) Images
If an image is deemed presentational only, it will not have alt text. The decision about whether an image is strictly decorative can be subjective and based on the context of the book or an author’s/publisher’s preference.
The alt field will be empty in the final HTML. This is triggered within the Digital Hub by using “PRESENTATION” as the alt text. This also gets a role of “presentation” in the HTML so that read-aloud technology recognizes it is presentational.
Typically, a section break ornament, scribed as bkpub, should be considered presentational.
If an image has an aspect that is worth describing, it should have alt text. Decorative images that show action and will be included in all versions of the publication (print and digital) may benefit from having alt text. Decorative images that are used in a print version but are not retained for an e-book would likely be best treated as presentational.
To specify that an image is serving a purely decorative role, set the alt text to PRESENTATION anywhere in the workflow.
In Word:
{~?~IM: insert fig01 here. ALT: PRESENTATION}
In sam/ScML:
<fig><img src="fig01.jpg" alt="PRESENTATION"/></fig>
The resulting ePub will have empty alt text and the role set as follows:
In HTML:
<p class="fig"><img src="images/fig01.jpg" role="presentation" alt="" width="40" height="40"/></p>
These two attributes will alert assistive technology not to announce the presence of the image to users.
Suggested Alt Text for Standard Elements
Cover Images
Cover Page for [Book Title]
Logo Images
[Company Name] logo
Author or Editor Photos
Photo of Author [Author Name]
Photo of Editor [Editor Name]